Can a Snow Blower Remove Ice? A Complete Guide
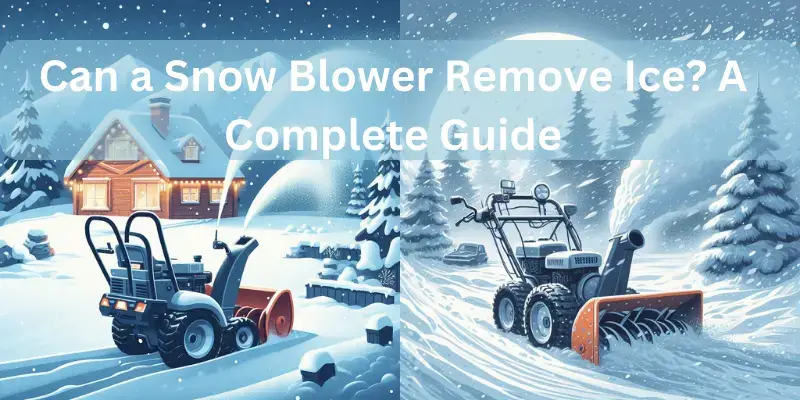
Winter ice on your driveway is a completely different problem from snow. Snow is soft and moveable — ice is hard, dense, and bonded to the surface. So when people ask whether a snow blower can remove ice, the honest answer is: yes, but with important limitations.
A snow blower is not designed to be an ice removal machine. However, a two-stage or three-stage gas snow blower with the right technique can break up and clear thin to moderate ice effectively. A single-stage snow blower, on the other hand, will struggle with ice and can actually damage itself trying.
In this guide I will explain exactly which snow blowers handle ice, how to use them safely on icy surfaces, and what to do when the ice is too thick for any snow blower to handle.
Can a Snow Blower Remove Ice? The Direct Answer
Yes — but it depends on three things:
- The type of snow blower you have
- The thickness of the ice
- The technique you use
Here is a simple breakdown:
| Ice Condition | Single-Stage | Two-Stage | Three-Stage |
| Thin ice layer (under 1 inch) | Risky | YES | YES |
| Moderate ice (1-2 inches) | No | YES | YES |
| Thick ice (over 2 inches) | No | Partial | Better |
| Sheet ice bonded to pavement | No | No | No |
The key rule: No snow blower can remove ice that is fully bonded and frozen solid to the pavement. That type of ice requires ice melt, a flat shovel, or an ice chopper first.
Which Snow Blower Types Handle Ice Best?
Two-Stage Snow Blowers — Best for Ice
Two-stage snow blowers are the most practical choice for ice removal. The metal auger is designed to break through hard-packed snow and light ice, and the impeller fan then throws the broken material out through the chute.
Why they work on ice:
- Metal auger (not rubber) breaks through ice effectively
- Auger floats above the ground — you can set it to the ice surface height
- Powerful gas engine provides enough torque to break through resistance
- Self-propelled drive means you do not have to push through resistance yourself
Limitations:
- Cannot handle ice thicker than 2 inches without first treating the surface
- Very hard ice can cause auger shear pins to break — which is actually a safety feature protecting the machine
Three-Stage Snow Blowers — Most Powerful Option
Three-stage models add an accelerator between the auger and impeller. This extra component breaks material into smaller pieces before ejecting it, which means they can handle heavier and harder ice than two-stage models.
Best for: Long driveways, frequent ice buildup, commercial use, areas with freeze-thaw cycles that create hard ice layers repeatedly.
Single-Stage Snow Blowers — Avoid for Ice
Single-stage snow blowers use a rubber auger that contacts the ground directly. On ice, this rubber auger:
- Cannot generate enough force to break through hard ice
- Can crack or tear the rubber impeller on contact with hard ice
- May throw chunks of ice at high speed, creating a safety hazard
Do not use a single-stage snow blower on ice. The machine is not designed for it and you risk damaging it permanently.
Electric and Battery Snow Blowers — Not Suitable for Ice
Electric and battery-powered snow blowers are almost all single-stage machines. They have lower torque than gas models and rubber augers. They are good for light snow but should not be used for ice removal.
How to Use a Snow Blower on Ice — Step by Step
Step 1: Apply Ice Melt or Rock Salt First
Before you bring out the snow blower, spread ice melt or rock salt over the icy area. Wait 15 to 20 minutes. This breaks the bond between the ice and the pavement surface, making the ice much easier for the auger to break up and clear.
Best ice melt products for this purpose:
- Calcium chloride — works fastest, effective down to -25°F
- Magnesium chloride — gentler on concrete and vegetation
- Rock salt (sodium chloride) — cheapest option, works well above 15°F
Step 2: Break Up Thick Ice Manually First
If the ice is more than 1.5 inches thick, use an ice chopper or flat spade to break it into smaller chunks before using the snow blower. Large solid slabs of ice can jam the auger or break shear pins.
Work in a crosshatch pattern — score the ice in one direction then the other — to create manageable pieces.
Step 3: Set Your Snow Blower Correctly
Before starting:
- Set the auger height so it skims just above the ice surface
- Engage the slowest forward speed setting
- Make sure the discharge chute is aimed away from people, vehicles, and windows — ice chunks can travel far and fast
Step 4: Make Slow, Steady Passes
Move at the slowest pace your snow blower allows. Rushing through ice causes the auger to bounce and lose contact, reducing effectiveness and increasing the chance of jamming.
Overlap each pass by about 2 inches to ensure complete coverage.
Step 5: Watch for Shear Pin Warning Signs
If your snow blower suddenly sounds like it is struggling and the auger slows or stops while the engine keeps running, a shear pin has likely broken. This is a deliberate safety mechanism — the shear pin breaks to protect the auger gearbox from damage when it hits something too hard.
What to do:
- Stop the machine immediately
- Replace the broken shear pin (keep spares — they are inexpensive and available at any hardware store)
- Before restarting, break up the ice chunk that caused the jam manually
Step 6: Clean Up Remaining Ice
After the snow blower pass, a thin layer of ice may remain bonded to the surface. Apply additional ice melt to this layer and use a flat ice scraper to remove the remainder.
When a Snow Blower Cannot Help — What to Do Instead
There are situations where ice is simply too thick or too bonded for any snow blower to handle safely. Here is what works instead:
Ice Melt and Rock Salt
The most effective and damage-free method for removing sheet ice. Apply generously, wait for it to penetrate and break the bond, then shovel or scrape the loosened ice away.
Tip: Calcium chloride works the fastest and at the lowest temperatures. Use it for emergency situations where you need ice gone quickly.
Ice Chopper or Ice Scraper
A long-handled ice chopper (also called an ice bar or ice scraper) is the most direct tool for breaking up thick bonded ice. Use a downward stabbing motion to score and break the ice into manageable pieces, then shovel them away.
Flat Spade Shovel
A flat spade with a metal blade is effective for sliding under broken ice sheets and prying them up. Do not use a pointed shovel — it is harder to slide under ice effectively.
Hot Water (Use With Caution)
Pouring hot water on ice can melt it quickly, but this method has risks. On concrete driveways, the rapid temperature change can cause surface cracking over time. Also, the water can refreeze within minutes in very cold temperatures, creating a fresh and even more dangerous ice layer.
Use this method only on asphalt driveways in temperatures above 20°F, and follow immediately with ice melt to prevent refreezing.
Sand for Traction
If complete removal is not possible before you need to use the driveway, spread sand or cat litter over the icy surface for immediate traction. This does not remove the ice but makes it safe to walk and drive on while you wait for ice melt to work.
How to Prevent Ice Buildup on Your Driveway
Prevention is always easier than removal. Here are the most effective steps:
Apply ice melt before the storm
Pre-treating your driveway with ice melt or calcium chloride before freezing rain or sleet prevents ice from bonding to the surface in the first place. This is called anti-icing and it dramatically reduces the effort needed after the storm.
Clear snow quickly
Snow that sits on a driveway compacts and then freezes into ice as temperatures drop overnight. Clearing snow promptly after each snowfall prevents the freeze-compact cycle.
Improve drainage
Ice often forms in low spots where water pools and then freezes. Filling these depressions in your driveway and improving the slope toward drainage areas reduces ice formation over the long term.
Use a heated driveway mat
For regularly icy areas like the bottom of sloped driveways, a heated driveway mat placed in the problem zone can prevent ice formation entirely.
Frequently Asked Questions
Conclusion
A snow blower can remove ice — but only the right type used in the right way. A two-stage or three-stage gas snow blower is your best tool for breaking up moderate ice layers, especially when combined with ice melt applied beforehand. Single-stage and electric models should not be used on ice at all.
For thick, bonded sheet ice, no snow blower is a substitute for ice melt and manual tools. Use ice melt to break the surface bond first, break up thick sections with an ice chopper, then follow with the snow blower to clear the broken pieces efficiently.
The safest approach of all is prevention — pre-treating your driveway before a storm arrives keeps ice from forming a strong bond and makes the whole winter removal process much easier throughout the season.
Related Posts:
- Will a Snow Blower Work on a Gravel Driveway?
- Can a Snow Blower Overheat?
- Operating a Snow Blower in Wet Conditions
- Snowblower Loses Power When Hot