How to Change a Belt on a Snowblower?
When lots of snow builds up, a good snowblower becomes super important for winter. But what do you do if your trusty snowblower suddenly stops working well? Usually, the problem is a worn-out belt.
The auger drive belt is a crucial component of a snowblower, as it plays a key role in driving the auger, which is the part responsible for scooping up and propelling snow out of the machine. Essentially, the auger drive belt is what transfers power from the engine to the auger assembly, allowing it to function properly. Replacing a snowblower belt isn’t as hard as it seems.
This easy guide “How to Change a Belt on a Snowblower?” will show you exactly what to do, step by step. You will learn everything you need to know to fix it yourself. So, grab your tools, get ready to be handy, and let’s do this!
What is an Auger Drive Belt in a Snowblower?
An Auger Drive Belt, also called a Snow Thrower Auger Belt, is a vital part of a snowblower. It’s like a strong rubber band that connects the engine to the auger, which is the spinning part with blades that gather up the snow. When you start the snowblower, the engine powers up and turns the Auger Drive Belt, which then spins the auger, making the blades rotate and scoop up the snow.
In a single stage snowblower, the belt loops onto a single drive pulley, which then powers the belt, and passes under an idler pulley responsible for applying tension to the belt. When you engage the bail arm, the idler pulley tightens the belt around the drag pulley, causing the auger to rotate.
On the other hand, a dual stage snowblower typically features multiple drive pulleys, using one or more belts to drive both the auger and the impeller. If any of these belts become worn, stretched, or break, it will prevent the auger and impeller from rotating properly, impacting the snowblower’s performance.
These belts are tough and made to handle harsh winter conditions, but they can wear out over time from regular use and exposure to the weather. Replacing a worn-out Auger Drive Belt is crucial to keep your snowblower running smoothly.
How many belts does a Snowblower have?
The number of belts in a snowblower can differ based on its model and design, but typically, most two-stage snow blowers feature two belts.
Some models may include extra belts, like the Electric Chute Control Belt found in snow blowers with electric chute control, facilitating easy adjustment of snow discharge direction. Additionally, certain three-stage snow blowers might have an Impeller Drive Belt, transmitting power to the impeller responsible for propelling snow further through the discharge chute.
Therefore, the number of belts varies depending on the specific snowblower: most two-stage ones have 2 belts (Auger & Drive), while some may have 3 belts (Auger, Drive, + Electric Chute or Impeller). It’s essential to consult your owner’s manual or seek advice from a qualified technician to determine the precise number and type of belts your particular snowblower requires.
How do I know if my snowblower belt is bad?
Here are some signs that could mean your snowblower belt needs attention:
Performance Issues:
If your snowblower has trouble throwing snow effectively, even when the engine is running strong, it might be due to a worn or loose belt. Or if snow is coming out of the chute unevenly, the belt might be slipping and not giving consistent power to the auger. A worn or loose drive belt (the one that moves the wheels) can make it hard to maneuver the snowblower.
Visual and Physical Inspection:
Check for cracks, fraying, or missing parts in the belt. These are signs it needs replacing. Press down on the belt between the pulleys. A good belt should bounce back quickly. If it feels soft or mushy, it’s likely worn out. When the engine is off, gently press the belt between the pulleys. If it moves more than an inch, it’s probably too loose and needs adjusting or replacing.
Sound:
If you hear a high-pitched squealing noise while using the snowblower, it could mean the belt is slipping due to wear or tension issues.
Burning and smoke:
In severe cases, a badly worn belt struggling to transfer power might lead to burning and smoke. This needs immediate attention and replacement.
Your manual will have specific instructions for checking and adjusting belt tension for your snowblower model. Remember, these are just signs, and a professional technician can properly diagnose and fix any belt issues with your snowblower. If you suspect a problem, it’s a good idea to have it checked out by a pro.
When should I replace my snowblower belt?
To keep your snowblower belts in good shape, it’s important to consider both usage and age. After each use, especially during heavy snowfalls, inspect the belts for signs of wear such as cracks, fraying, or missing pieces, and replace them promptly if needed.
Listen for any unusual sounds like squealing during operation, which could indicate belt wear. Additionally, even if belts appear visually fine, it’s advisable to proactively replace them every 5-7 years due to the loss of elasticity and strength over time, which can diminish performance and increase the risk of slipping or breaking.
Factors such as frequency of use and storage conditions can also impact belt longevity. Consult your owner’s manual for specific replacement recommendations and don’t hesitate to seek assistance from a qualified technician if needed. By staying proactive and attentive, you can ensure your snowblower belts operate effectively, reducing the chances of unexpected issues during snowstorms.
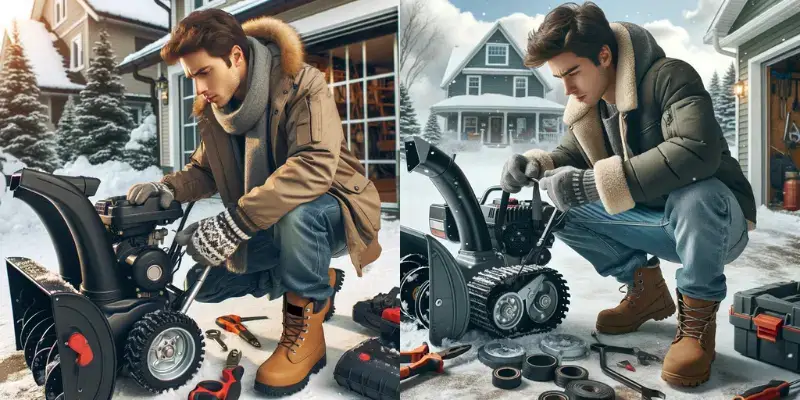
How to Change SnowBlower Auger Drive Belt?
Replacing a snowblower belt entails specific steps that may vary depending on the model, making it crucial to refer to your owner’s manual for precise instructions tailored to your snowblower. However, it’s essential to prioritize safety measures before starting any repairs. Always remember to disconnect the spark plug wire to prevent accidental engine start-up, and wear gloves to protect your hands from sharp edges and potential contaminants. These precautions help ensure a safe and successful belt replacement process.
Tools you might need:
- Wrenches or sockets (sizes may vary based on your model)
- Screwdrivers (flathead and Phillips)
- Needle-nose pliers (optional)
Steps to Change a Belt on a Snowblower:
To replace the snowblower belt, follow these detailed steps:
- Before replacing the belt, ensure the engine has cooled down to prevent accidental starting. For dual stage models, perform the procedure with little or no fuel in the tank to minimize hazards.
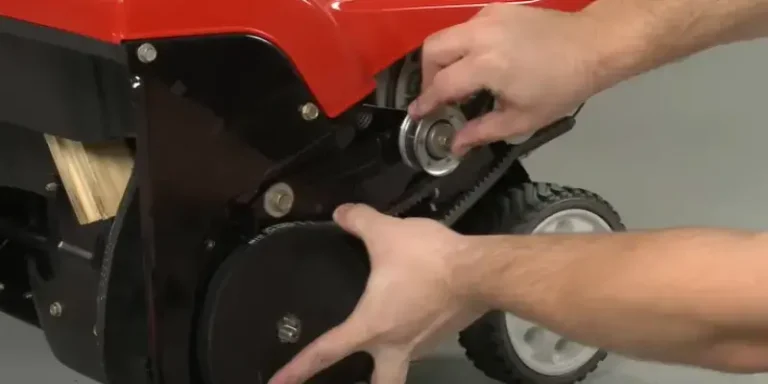
- Locate the Belt Cover: Find the cover on your snowblower that provides access to the belts. Consult your manual to pinpoint its location.
- Remove the Belt Cover: Utilize the appropriate wrench or screwdriver to loosen and remove the screws or bolts securing the cover in place.
- Identify the Belt to Replace: Depending on your snowblower model, there may be one or two belts. Consult your manual to identify the specific belt needing replacement.
- Release the Belt Tension: Typically, this involves a tensioner pulley mechanism. Follow your manual’s instructions to loosen the tensioner according to your model.
- Remove the Old Belt: Once the tension is released, carefully slip the old belt off the pulleys.
- Install the New Belt: Match the new belt’s size and routing to the old one. Refer to the routing diagram in your manual for guidance on how to loop the belt around the pulleys. Begin by placing the belt on one of the pulleys, and then, with the tensioner still loose, guide it around the remaining pulleys according to the diagram.
- Re-tension the Belt: Follow your manual’s instructions to properly tension the belt using the tensioner mechanism.
- Reinstall the Belt Cover: Secure the cover back in place using the screws or bolts you removed earlier.
- Reconnect the Spark Plug Wire: Ensure the spark plug wire is securely reconnected to its designated location on the engine to prevent accidental engine start-up.
How do you tighten a snowblower drive belt?
Consult your manual for detailed guidance on adjusting the tensioner for your specific model. In most cases, for a slotted hole tensioner, slightly loosen the bolt and move the pulley closer to the belt to increase tension. Ensure the bolt is securely tightened to hold the pulley in place. For a spring-loaded tensioner, find the adjustment point and tighten the nut or bolt to increase spring pressure and belt tension, being careful not to over-tighten.
Test the belt tension with the engine off by pressing down on the belt between the pulleys, ensuring it has a slight give but not too much slack, following your manual’s recommended deflection amount. Reinstall the belt cover using the previously removed screws or bolts, and reconnect the spark plug wire to its designated location on the engine.
Remember not to over-tighten the belt, as it can strain the engine and the belt, leading to premature wear. Always refer to your owner’s manual for specific instructions, diagrams, and recommended tension levels for your snowblower model. If unsure or encountering difficulties, seek assistance from a qualified technician.
My Final Thoughts:
Maintaining a functional snowblower is vital for winter snow management. Identifying signs of a worn-out auger drive belt and replacing it promptly is essential. Following safety measures and consulting the manual, you can confidently replace the belt, ensuring optimal performance. Regular inspections and proactive replacement based on usage and age are key. Seek professional help if needed. With proper care, your snowblower will be ready for winter’s challenges.

About Naveed A Hashmi
In my childhood, I used to see my parents while working in the land, for these reasons today I have been serving the same as our own tradition and culture. I thus love to stay in it, because I want to learn something advanced and new so that I may improve my farm’s contour and help others with my experience.