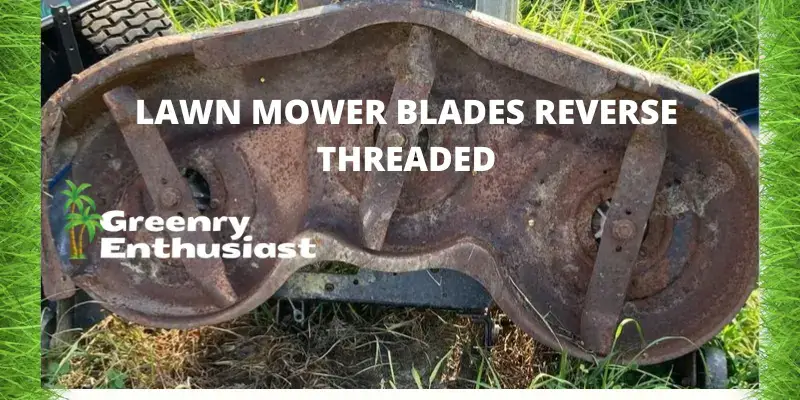
Are Lawn Mower Blades Reverse Threaded?
If you have ever tried to remove a lawn mower blade and the bolt would not budge — or worse, you turned it the wrong way and stripped the threads — you already know why this question matters.
Most lawn mower blades are not reverse threaded. The blade bolt on most mowers follows standard threading, meaning you turn it counter-clockwise to loosen and clockwise to tighten — just like any regular bolt.
However, there are important exceptions depending on your mower brand and model. Getting this wrong can damage your mower, strip the bolt, or cause the blade to come loose during use, which is a serious safety risk.
Here is everything you need to know.
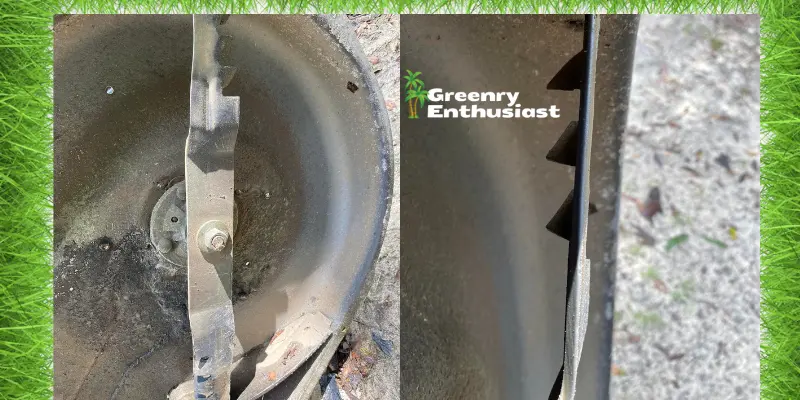
Are Lawn Mower Blades Reverse Threaded?
Most lawn mower blades are NOT reverse threaded.
The majority of walk-behind mowers, riding mowers, and zero-turn mowers use a standard right-hand thread bolt to hold the blade onto the crankshaft. This means:
This is the same direction as almost every bolt you encounter in daily life.
However, a small number of mower models — particularly some older Craftsman models — do use a reverse thread (left-hand thread) bolt. On these machines:
The reason reverse threads exist is to prevent the bolt from loosening during operation. On some mower designs, the rotation of the blade would naturally work to unscrew a standard thread bolt over time. A reverse thread counters this by tightening with every rotation.
Which Lawn Mower Brands Use Reverse Thread?
Here is a quick reference table based on commonly reported user experiences and manufacturer documentation:
| Brand | Reverse Threaded? | Notes |
| Craftsman | Some older models — Yes | Check your model number |
| John Deere | No | Standard thread on most models |
| Toro | No | Standard thread |
| Husqvarna | No | Standard thread |
| Cub Cadet | No | Standard thread |
| Honda | No | Standard thread |
| Troy-Bilt | No | Standard thread |
| Ariens | No | Standard thread |
Important: Always check your owner’s manual for your specific model before attempting blade removal. Even within the same brand, threading direction can vary between model years.
How to Tell If Your Blade Bolt is Reverse Threaded
Before you start turning that bolt, here is how to confirm the thread direction:
Method 1 — Check Your Owner’s Manual
The fastest and most reliable method. Look for the blade removal section — it will clearly state the bolt direction. If you have lost your manual, search “[your mower brand + model number] owner’s manual PDF” on Google.
Method 2 — Look for Markings on the Bolt
Some manufacturers stamp a small “L” or arrow on reverse thread bolts. Look closely at the bolt head with a flashlight. A standard bolt will have no special markings.
Method 3 — Try the Standard Direction First
Apply firm counter-clockwise pressure first (standard loosen direction). If the bolt does not move after reasonable force, try clockwise. Never force a bolt — if it is not moving, you are likely going the wrong direction.
Method 4 — Check Online Forums for Your Model
Mower forums like LawnSite.com have detailed threads for almost every mower model. Search your model number and “blade bolt direction” for a definitive answer from other owners.
How to Remove a Lawn Mower Blade Safely — Step by Step
What You Need:
Step 1: Safety First — Disconnect the Spark Plug
Before you touch anything under the deck, pull the spark plug wire away from the spark plug. This prevents any accidental engine start while your hands are near the blade. This step is not optional.
Step 2: Tilt the Mower Safely
For walk-behind mowers, tilt the mower onto its side with the air filter and carburetor facing UP. If the carburetor faces down, oil can flood into the air filter and damage the engine.
For riding mowers, use a mower lift or jack stands to raise the deck to a comfortable working height.
Step 3: Block the Blade
Insert a wooden block (a scrap piece of 2×4 works perfectly) between the blade and the inside of the mower deck. This prevents the blade from spinning while you apply force to the bolt.
Alternatively, use a blade stopper tool — an inexpensive tool available at any hardware store that clamps onto the blade to hold it still.
Step 4: Apply the Correct Direction
Now that you know your thread direction (from the steps above):
- Standard thread: Turn the bolt counter-clockwise to loosen
- Reverse thread: Turn the bolt clockwise to loosen
Apply firm, steady pressure. Do not use sudden jerking motions, which can damage the bolt head.
Step 5: Stubborn Bolt — What to Do
If the bolt will not move:
Use penetrating oil:
Spray WD-40 or a dedicated penetrating oil like PB Blaster onto the bolt threads. Wait 10 to 15 minutes and try again. For very stuck bolts, apply penetrating oil and wait overnight.
Use a breaker bar:
A longer handle gives you more leverage. Attach a breaker bar extension to your socket wrench for extra torque.
Apply heat (last resort):
A heat gun or propane torch applied to the bolt for 30 seconds expands the metal slightly, breaking the corrosion seal. Be careful around plastic parts and fuel lines.
Step 6: Remove the Blade
Once the bolt is loose, remove it completely along with any washers. Note the order and orientation of washers before removing them — take a photo with your phone so you can reinstall them correctly.
Remove the blade carefully — edges can still cut even when they appear dull.
Step 7: Reinstall with Correct Torque
When reinstalling the blade after sharpening or replacement:
- Clean the bolt threads and apply a small amount of anti-seize compound to prevent future sticking
- Reinstall the blade in the correct orientation (the blade edge should face the direction of rotation)
- Tighten the bolt to the manufacturer’s specified torque — usually between 35 and 50 ft-lbs for most walk-behind mowers and 70 to 90 ft-lbs for riding mowers
- Use a torque wrench to be precise — an undertightened blade can come loose during operation
How Often Should You Remove and Sharpen the Blade?
Most lawn care experts recommend sharpening your mower blade every 20 to 25 hours of mowing, or at least once per season for the average homeowner.
Signs your blade needs sharpening:
- Grass tips look torn or frayed rather than cleanly cut
- You need multiple passes to cut the same area
- Your lawn looks brown at the tips a day or two after mowing (torn grass tips die back faster than cleanly cut ones)
- The cut line is uneven or wavy
Common Mistakes When Removing Lawn Mower Blades
Not disconnecting the spark plug — This is the most dangerous mistake. Always disconnect first.
Tilting the mower the wrong way — Carburetor and air filter should always face up. Oil flooding into the air filter is an expensive repair.
Forcing a stuck bolt — Forcing can strip the threads completely, making removal much harder. Use penetrating oil and patience first.
Reinstalling the blade upside down — A blade installed upside down will not cut grass — it will push it down instead. Check that the blade edge faces the direction of rotation before tightening.
Over-tightening the bolt — More is not always better. Over-tightening can stretch or damage threads. Always use a torque wrench and follow the manufacturer’s specification.
FREQUENTLY ASK QUESTIONS (FAQs)
CONCLUSION
Most lawn mower blades are not reverse threaded — the standard direction applies to the vast majority of modern mowers from John Deere, Toro, Husqvarna, Honda, and others. Some older Craftsman models are the main exception where reverse thread bolts appear.
Before removing your blade, always check your owner’s manual to confirm the thread direction for your specific model. Disconnect the spark plug, block the blade properly, and use steady pressure in the correct direction. With the right technique, blade removal is a straightforward maintenance task you can do at home in under 15 minutes.
Related Posts:
- How to Sharpen a Lawn Mower Blade on Your Own
- Lawn Mower Blade is Spinning But Not Cutting
- Quick and Easy Fixes for Lawn Mower Oil Leaks

About Naveed A Hashmi
In my childhood, I used to see my parents while working in the land, for these reasons today I have been serving the same as our own tradition and culture. I thus love to stay in it, because I want to learn something advanced and new so that I may improve my farm’s contour and help others with my experience.