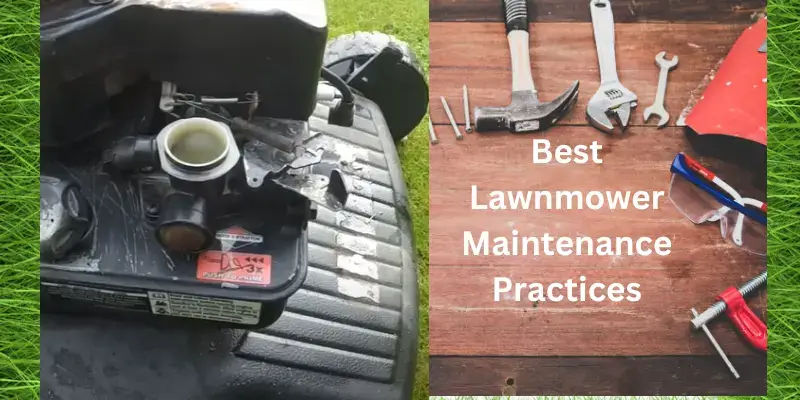
Best Lawn mower Maintenance Tips
Lawnmowers are mandatory for gardening professionals as well as enthusiasts. It is obvious when you are using a mower regularly for your lawn care. Of course, there is a need for maintenance to the lawnmower itself.
Many homeowners and gardening professionals are not careful about the maintenance of their machines which ultimately develop a fault. In many cases, it is very costly to repair these mowers especially when you are using a riding lawnmower.
Therefore, in this article, I will provide you with the Best lawn mower maintenance practices which I have followed for years, and a step-by-step guide to maintenance and looking after your mower at home without any hurdles.
Why Lawn Mower Maintenance Matters?
Lawnmower maintenance is important because it will protect your machine from any faults. Regular maintenance not only keeps your mower running smoothly but also extends its life and ensures the efficient mowing of your lawn.
Changing of Engine Oil
The first and foremost practice is to regularly change your lawnmower oil. It is similar to that any human being needs a sip of water to go. Change the oil after every mowing session if you are working on a large property. You can also check the user manual where the company always provides information regarding oil change. In general, you can change the oil after 25 hours of use.
Why Changing the Oil is Important:
Just like in a car, the oil in your lawnmower lubricates the engine’s moving parts, reducing friction and wear. Over time, oil breaks down and gets contaminated with dirt and debris. This gunky oil can’t protect the engine as well, leading to faster wear and potentially costly repairs. Regular oil changes ensure your engine stays in tip-top shape, making your lawnmower more reliable and efficient.
Step-by-Step Guide to Changing Lawnmower Oil:
Tools and Materials Needed:
- Fresh engine oil (check your lawnmower’s manual for the right type)
- A wrench (for removing the drain plug)
- An oil drain pan
- Gloves and rags for cleanup
- A funnel (optional, but handy)
Steps to Follow:
Warm Up the Engine: Run your lawnmower for a few minutes. Warm oil drains more easily and completely.
Turn Off and Cool Down: Turn off the engine and let it cool slightly. You don’t want to burn yourself!
Locate the Drain Plug/Oil Cap: This is typically under the mower or near the bottom of the engine.
Drain the Old Oil: Place the drain pan under the plug, remove the plug, and let the old oil flow out. If your mower has an oil removal kit, you might be sucking the oil out instead.
Replace the Drain Plug: Once drained, replace and tighten the drain plug.
Add New Oil: Using a funnel, pour fresh oil into the engine. Be careful not to overfill – check the level with the dipstick.
Clean Up: Wipe away any spills and properly dispose of the old oil.
Frequency: Generally, you should change your lawnmower’s oil after every 25-50 hours of use, or at least once every mowing season.
Cleaning/ Replacing of Spark Plug
The spark plug is the main component of a combustion engine. The spark plug can provide the current for igniting that mower needs. With time, it gets dirty because of carbon and not working properly. Your mower is going to start after many ignitions or sometimes lose power during mowing your lawn. You can disconnect or remove the spark plug and clean it properly once a month and if you find it has deteriorated replace it with a new one. The spark plug is an easily available item and not very expensive but very useful to keep your mower working.
Why Replacing the Spark Plug is Important:
The spark plug is the tiny but mighty hero that ignites the fuel in your lawnmower’s engine, starting the whole shebang. When it’s in good shape, your mower starts easily, runs smoothly, and works efficiently. A worn or dirty spark plug can cause starting troubles, a rough-running engine, or even prevent the engine from starting at all. Regular replacement ensures your mower’s engine fires up correctly and runs at its best.
Step-by-Step Guide to Replacing Lawnmower Spark Plug:
Tools and Materials Needed:
Steps to Follow:
Safety First: Ensure the mower is off and cool. Disconnect the spark plug lead to prevent accidental starts.
Remove the Old Spark Plug: Using the spark plug socket or wrench, carefully unscrew and remove the old spark plug from the engine.
Inspect and Prepare the New Spark Plug: Check the new spark plug for any damage. Use a gap gauge to ensure the gap matches the specifications for your mower (found in the manual).
Install the New Spark Plug: Hand-tighten the new spark plug into the engine, then give it a final snug with the socket or wrench. Be careful not to over-tighten, as this can damage the thread.
Reconnect the Spark Plug Lead: Attach the lead back onto the new spark plug.
Frequency: Generally, you should replace the spark plug once a year or every mowing season. However, if your mower is used heavily or exhibits starting problems, you might need to do this more frequently.
Checking of Filters
Filters are also an essential component of lawnmowers. It is like a mower nose. Check the air filter regularly after every mowing session and if not possible must be checked once in a month. Clean it properly and if damaged replace it with a new one.
In some lawnmowers, fuel filters are also used which clean the fuel which is coming from the tank. These filters are also dirty after some time because of the impurities in the fuel so always check and clean these filters and replace them if needed.
Why Cleaning/Replacing the Air Filter Matters:
The air filter in your lawnmower has a pretty crucial job: it stops dirt and debris from getting into the engine. Imagine trying to run a marathon while breathing through a cloth – that’s what a dirty air filter is like for your mower. A clean air filter ensures proper air intake, which is vital for the engine to mix air and fuel efficiently. A clogged filter makes the engine work harder, reducing fuel efficiency and potentially causing more serious engine problems.
Step-by-Step Guide to Cleaning/Replacing Lawnmower Air Filter:
Tools and Materials Needed:
Steps to Follow:
Locate the Air Filter: Usually, it’s housed in a small box or cover near the engine.
Remove the Cover: Often, this can be done without tools – just unclip or unscrew the cover.
Examine the Filter: Take out the air filter and check it. If it’s lightly soiled, you can clean it. If it’s very dirty or damaged, replace it.
Clean the Filter (if not replacing):
- Gently tap the filter to remove loose dirt.
- If it’s a foam filter, wash it with soap and water, then squeeze (don’t wring) it out and let it dry completely.
For paper filters, just brush off the dirt. Don’t wash these!
- Install the Filter: Put the clean or new filter back in place.
- Replace the Cover: Secure the cover back over the filter.
Frequency: Check the air filter every 3 months or after about 25 hours of use. Clean it if it’s dirty, and aim to replace it once a year, or more often if you use your lawnmower heavily.
The game of sharp blades
Another best practice is to keep your mower blades sharp. Inspect the blades carefully while before use. If blades are dull immediately sharpen them. In case of damaged blades check the size from the user manual and replace old blades with new ones to upkeep your lawnmower.
Why Cleaning and Sharpening the Blades is Important:
Sharp blades make clean cuts, while dull blades tear the grass, causing damage and stress to your lawn. This tearing can lead to a ragged lawn appearance and even make your grass more susceptible to diseases and pests. Clean, sharp blades, on the other hand, ensure a neat cut, promoting healthy, vigorous growth. Plus, it makes mowing easier and more efficient for your mower.
Step-by-Step Guide to Cleaning and Sharpening Lawnmower Blades:
Tools and Materials Needed:
Steps to Follow:
a. Safety First: Disconnect the spark plug wire to prevent accidental starts.
b. Remove the Blades: Tip the mower on its side and use the wrench to remove the bolt or nut holding the blade in place.
c. Clean the Blades: Use the brush and soapy water to clean any grass, dirt, or debris off the blades. Dry them thoroughly.
d. Inspect the Blades: Check for any major damage or cracks. If a blade is severely damaged, it’s better to replace it.
e. Sharpen the Blades: Secure the blade in a vice or clamp. Use a file or blade sharpener, following the angle of the blade’s edge, to sharpen it until it’s honed to a good edge.
f. Check the Balance: An unbalanced blade can cause vibrations and damage your mower. Use a balancer to check, and remove a little metal from the heavier end as needed.
g. Reattach the Blades: Put the blades back on the mower, ensuring they’re securely fastened.
Frequency: Sharpen your blades at least once a year or twice per mowing season if you use your mower frequently. Clean them regularly, especially if you mow in damp conditions or hit a lot of debris.
Fuel Quality to run the mower smoothly
I have noticed that many of my family, friends, and relatives are experiencing different kinds of problems like power lag. When I recommend changing the fuel, the problem will be resolved easily. So, always use fresh fuel when you are mowing using a riding lawnmower. Because old fuel can reduce the performance of your machine. You must have knowledge about the type of oil that does not damage your lawn mower.
Good fuel maintains the lawn mower in excellent condition.
Why Stabilizing the Fuel is Important:
Fuel, especially gasoline, can degrade over time. When it sits in your lawnmower’s tank during the off-season, it can become stale, leading to issues like gum and varnish deposits in the fuel system. This can clog up the carburetor and fuel lines, making it hard, or even impossible, to start your mower when the grass-cutting season rolls back around. Using a fuel stabilizer helps to keep the fuel fresh, ensuring your lawnmower starts easily and runs smoothly when you need it.
Step-by-Step Guide to Stabilizing Lawnmower Fuel:
Tools and Materials Needed:
Steps to Follow:
a. Read the Instructions: Different stabilizers have different instructions, so read the label for the correct amount to use.
b. Add Stabilizer to the Fuel Tank: If your tank is low, add the stabilizer before you fill it up with fresh fuel. This helps mix the stabilizer thoroughly with the fuel.
c. Fill the Tank: Fill your tank with fresh fuel. A full tank leaves less room for air, which contains moisture that can cause fuel degradation.
d. Run the Engine: After adding the stabilizer, run the engine for a few minutes. This helps circulate the stabilized fuel through the carburetor and fuel system.
e. Store Your Mower: If you’re prepping your mower for storage, now’s the time to put it away.
Frequency: Stabilize your fuel at the end of the mowing season or whenever you plan to store your mower for an extended period (typically, more than 30 days).
Checking of Tire Pressure
One another thing I have experienced is when your mower tire pressure is low the performance and efficiency are reduced. Your lawnmower cannot trim the grass perfectly. Always check the tire pressure before starting mowing every time.
Why Checking Tire Pressure is Important:
Proper tire pressure ensures your lawnmower rolls easily over your lawn, providing good traction and maneuverability. Under-inflated tires can cause uneven cuts and make your mower work harder, which could strain the engine over time. Over-inflated tires might result in a bumpy ride and poorer control. Consistent pressure in all tires also helps to ensure an even cut across your lawn.
Step-by-Step Guide to Checking Lawnmower Tire Pressure:
Tools and Materials Needed:
Steps to Follow:
a. Find the Recommended Pressure: Check your lawnmower’s manual for the recommended tire pressure. It’s usually lower than car tire pressure, often around 10-20 PSI.
b. Check the Pressure When Tires are Cold: For the most accurate reading, check the pressure when the tires are cold, before you’ve used the mower.
c. Remove the Valve Cap: Unscrew the cap from the tire’s valve stem.
d. Measure the Pressure: Press the tire gauge firmly onto the valve stem. Read the pressure level and compare it to the recommended PSI.
e. Adjust the Pressure if Necessary: If the pressure is too low, use an air pump to add air. If it’s too high, let some air out until you reach the desired pressure.
f. Replace the Valve Cap: Don’t forget to screw the valve cap back on to protect the valve from dirt and debris.
Frequency: Check the tire pressure at least once a month during the mowing season and before you store it for the winter. It’s also a good idea to check if you notice the mower is cutting unevenly or handling poorly.
External Cleaning
Lastly, I always recommend that you clean your mower body, and deck area and remove grass clippings after every now because if grass clippings are going inside it may develop a fault in your machine. Similarly, if you clean the outer body, it will extend the life cycle of your lawnmower.
When to Perform Lawn Mower Maintenance
- Before First Use: Do a thorough tune-up to start the mowing season, including oil change, new spark plug, sharpening blades, lubrication, etc.
- After 25 Hours of Use: Change the engine oil for the first time per manufacturer instructions. Check the air filter.
- Halfway Through Mowing Season: Mid-season oil changes around 25-50 hours of mowing. Lubricate parts.
- After Mowing Season: Full tune-up to prepare for storage. Add fuel stabilizer, replace oil and filter, clean underside, and sharpen blades.
- Before Winter Storage: Drain fuel, run engine dry, clean deck, lubricate parts, coat mower blades with preventive.
- Spring Wake-up: Full pre-season maintenance like new oil, plug, and filter. Check belts, tires, and batteries. Test safety features.
- Any Sign of Trouble: Don’t wait for scheduled maintenance if you notice any issues like vibration, hard starting, or noises. Service immediately.
- After Long Periods of Non-Use: Tune-up if the mower sits idle for more than a couple of months to keep the engine and parts in good shape.
Staying on top of regular maintenance intervals will provide reliable starting and peak mowing performance.
Annual Lawn Mower Maintenance Checklist
- Change the engine oil: Drain old oil and replace it with fresh oil per the owner’s manual. Helps extend engine life.
- Replace the air filter: A clean air filter allows proper airflow to the engine. Replace paper filters annually.
- Replace the spark plug: Old spark plugs can cause hard starting. Annual plug replacement is recommended.
- Sharpen or replace mower blades: Sharp blades provide a clean cut. Dull blades tear the grass. Inspect and sharpen.
- Clean mower deck: Remove grass clippings and debris buildup under the deck to prevent rust and improve cutting.
- Check belts: Inspect belts for wear, cracks and proper tension. Replace worn belts.
- Clean battery connections: Use a wire brush to clean corrosion from battery terminals to ensure a good connection.
- Clean under the mower: Remove accumulated grass clippings from under the mower using a small trowel or stick.
- Lubricate: Oil all moving metal parts and bearings. Grease any zerks on pivot joints.
- Check tires: Ensure tires are inflated properly and have adequate tread. Replace worn tires.
Following this annual maintenance checklist will help keep your lawn mower running efficiently for years.For further details to sharpen your mower check your owner’s manual.
FREQUENTLY ASK QUESTIONS (FAQs)
Conclusion
In conclusion, Gardening is not just mowing the grass, but it needs full attention with maintained tools and machines. Lawnmower maintenance is very important because the beauty of your grass depends upon your mower’s performance. If your machine is not working perfectly, you can bear serious consequences in terms of ugly grass cutting on your lawn.
Similarly, if your mower develops a serious fault you need handsome money to repair it. you must pay the repair technician and also waste your time in repairing the faulty mower.
Therefore, the above-mentioned best lawn mower maintenance practices are very common and easy to perform at home without any problem but the result of these small practices are remarkable. Your mower performance is never reduced and life is also extended. In case of any query feel free to comment below or contact us through our email.

About Naveed A Hashmi
In my childhood, I used to see my parents while working in the land, for these reasons today I have been serving the same as our own tradition and culture. I thus love to stay in it, because I want to learn something advanced and new so that I may improve my farm’s contour and help others with my experience.