How to Clean a Craftsman Snowblower Carburetor without Removing it?
As winter starts to ease up, if your trusty Craftsman snowblower is acting up with sputtering and coughing, it might be due to a dirty carburetor, which is like the heart of its fuel system. This part mixes air and gasoline to keep your machine running smoothly through snow.
But don’t worry about taking it apart! This guide will show you how to clean it without removing it, saving you time and hassle. Picture the carburetor as a small chef carefully blending air and fuel for your engine’s hunger. Over time, gunk can block its passages, causing problems like rough idling or stalling.
Instead of tackling the intimidating task of removing the carburetor, this guide will walk you through cleaning it right on your snowblower. We will help you gather the right tools, choose cleaners, and guide you step-by-step through the process. Plus, we will throw in some tips for preventing future clogs. So, get your cleaning supplies ready, channel your inner handyman, and get ready to revive your snowblower for more efficient snow clearing without the daunting task of removing the carburetor. Keep reading…!
Why is Cleaning of Snowblower Carburetors important?
The snowblower carburetor is a vital part of the engine that mixes air and fuel just right for it to work properly. It’s like a little blender making sure your snowblower runs smoothly. Using the engine’s movement, the carburetor pulls in air through a special intake. It carefully controls how much gasoline goes into the engine based on what it needs. Mix them together to make a mix that can burn. It delivers the mix to the engine so it can power the snowblower.
Cleaning the snow blower carburetor is important because, dirt and bits of gasoline can build up in the carburetor over time, blocking the tiny passages. This can mess up the balance of air and fuel and cause problems like:
- Hard starting: The engine has trouble getting enough fuel to start.
- Running unevenly: The engine doesn’t run smoothly because the mix isn’t right.
- Losing power: Not getting enough fuel for good performance.
- Stalling: The engine stops suddenly because it’s not getting enough fuel.
To avoid these problems, it is important to clean your snowblower carburetor regularly. Depending on how much you use it and the quality of the fuel, you might need to clean it every 1-2 seasons.
To clean, take off the carburetor and check for dirt. Blow away any debris with air and wipe it clean. For deep cleaning, if it’s really dirty, you might need to take it apart and soak some parts in a special cleaner. Then put it back together carefully.
Different Ways to Clean a Craftsman Snowblower Carburetor without Removing it:
While it’s usually best to take out the carburetor for a really good clean, there are a few ways to try cleaning your Craftsman snowblower carburetor without removing it. But there are some important things to remember, before you start that these methods are good for small blockages and basic upkeep, not big problems. They might not fix everything that’s wrong with the carburetor and be careful and understand the risks involved. If you are not sure what you are doing, it is best to ask a mechanic for help.
Here are some ways you can try:
Blowing with compressed air:
Find the air holes on the carburetor that you can reach (check the manual or look online). Use compressed air with gentle bursts to blow out any loose dirt. Be careful not to aim the air directly into sensitive parts, as it could cause damage.
Using carburetor cleaner spray:
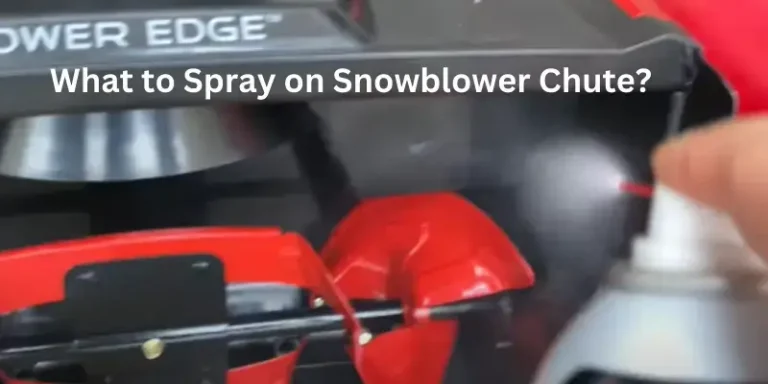
Some sprays come with long tubes to reach inside. Find the openings you can access, like the throttle or idle jets. Spray a little bit inside to help clear out small blockages. Do not use too much spray, or it could flood the engine. Wipe off any extra.
Adding cleaner to the fuel:
Put a fuel system cleaner into your gas tank following the instructions. This can help break up tiny bits of dirt inside the carburetor. Remember, this is more about stopping problems than fixing them directly.
But there are some things to keep in mind:
These methods only work on parts you can get to easily and for small problems. They won’t reach deep inside or clear out big blockages. If you really want to clean everything properly or if there’s a serious issue, you’ll probably need to take the carburetor out. Trying to clean it the wrong way could make things worse and cost you a lot to fix. Again, if you’re not sure, it’s best to ask a mechanic for advice, especially if your snowblower still isn’t working right after trying these methods.
Step by Step Guide to Clean a Craftsman Snowblower Carburetor without Removing it:
To clean a snowblower carburetor without removing it, you will need the following tools and materials:
These tools and materials are essential for effectively cleaning a snowblower carburetor without removing it, ensuring that it operates smoothly and efficiently during use. Here are the steps in the process of cleaning a snowblower carburetor without removing it:
Step 1: Ensure the snowblower is cooled down – Before starting any maintenance, it is important to make sure the snowblower has cooled down completely. This prevents any risk of burns or injuries when working with hot engine components.
Step 2: Remove the muffler – The muffler often covers access to the carburetor. Follow the instructions in your snowblower’s manual to remove the muffler properly. This may involve loosening bolts or screws to detach it from the engine.
Step 3: Remove the oil tank – Carefully remove the oil tank to avoid spills. Some snowblowers have oil tanks positioned above the carburetor, and removing them provides better access for cleaning.
Step 4: Drain the oil from the carburetor bowl – Locate the drain screw or plug on the bottom of the carburetor bowl. Place an empty container underneath, then loosen the screw or plug to drain the oil. This removes any old or contaminated oil from the carburetor.
Step 5: Drain the fuel and clean the bowl area – Use a fuel line clamp or pinch-off pliers to stop the flow of fuel from the tank to the carburetor. Then, use a wet cloth to clean the bowl area thoroughly. This removes any dirt, debris, or old fuel residue that may have accumulated.
Step 6: Clean the nuts – Use a wire brush and carburetor cleaning solution to clean the nuts thoroughly. The nuts hold the carburetor in place, and ensuring they are free from any dirt or grime helps maintain a secure connection.
Step 7: Clean the carburetor holes and throat – Use a piece of copper wire to carefully clean out the small holes in the carburetor. These holes can become clogged with debris over time, affecting fuel flow. Additionally, spray carburetor cleaning solution around the throat of the carburetor to remove any deposits or buildup.
Step 8: Use compressed air – With the carburetor components cleaned, use a can of compressed air to blow through the carburetor. This helps remove any remaining dirt, debris, or cleaning solution from the internal passages and ensures a thorough cleaning.
Step 9: Reassemble all parts – Carefully reassemble all the parts, following the reverse of the disassembly process. Ensure that each component is put back together correctly and securely. Attention to detail during reassembly is crucial to ensure proper snowblower functionality.
By following these detailed steps, you can effectively clean your snowblower carburetor without removing it, helping to maintain optimal performance and reliability.
Tips to prevent future clogs in snowblower Carburetor:
My Final Thoughts:
Keeping your Craftsman snowblower carburetor clean without removing it is vital for smooth operation. Follow simple steps like using fresh fuel, adding stabilizers, and periodic cleaning to prevent clogs. Employing tools like wire brushes and compressed air helps clean the carburetor effectively. With proper maintenance, you can ensure your snowblower runs efficiently throughout the winter, minimizing downtime and maximizing performance.

About Naveed A Hashmi
In my childhood, I used to see my parents while working in the land, for these reasons today I have been serving the same as our own tradition and culture. I thus love to stay in it, because I want to learn something advanced and new so that I may improve my farm’s contour and help others with my experience.


